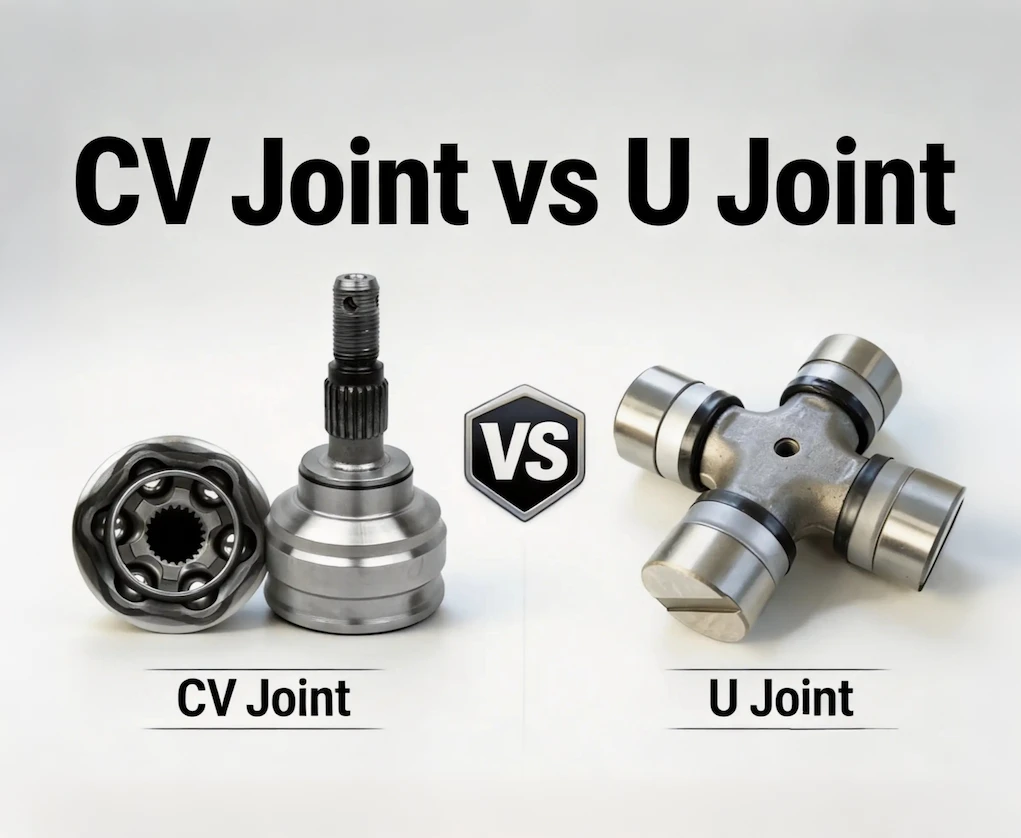

A double cardan joint costs just a few hundred dollars, yet overlooking double cardan joint failure can destroy your entire drive shaft. This risks severe damage to your transfer case or differential, turning a cheap fix into a massive bill. Yet, this small component remains a major maintenance blind spot for off-roaders and lifted trucks. Many drivers only notice it when they hear metallic clanking or feel violent vibrations under their seats. By then, the damage is done. This guide will show you how to spot the early warning signs, fix it affordably, and make your new joint last much longer.
Table of Contents
How to Spot a Failing Double Cardan Joint Early
A double cardan joint is a specialized driveshaft component designed to handle high angles and reduce vibration in lifted trucks and off-road vehicles. If a failing double cardan joint isn’t caught early, delaying repairs will lead to more damage and triple your final costs. Catching double cardan joint failure early is simple if you know what to look, listen, and feel for.
Auditory Symptoms
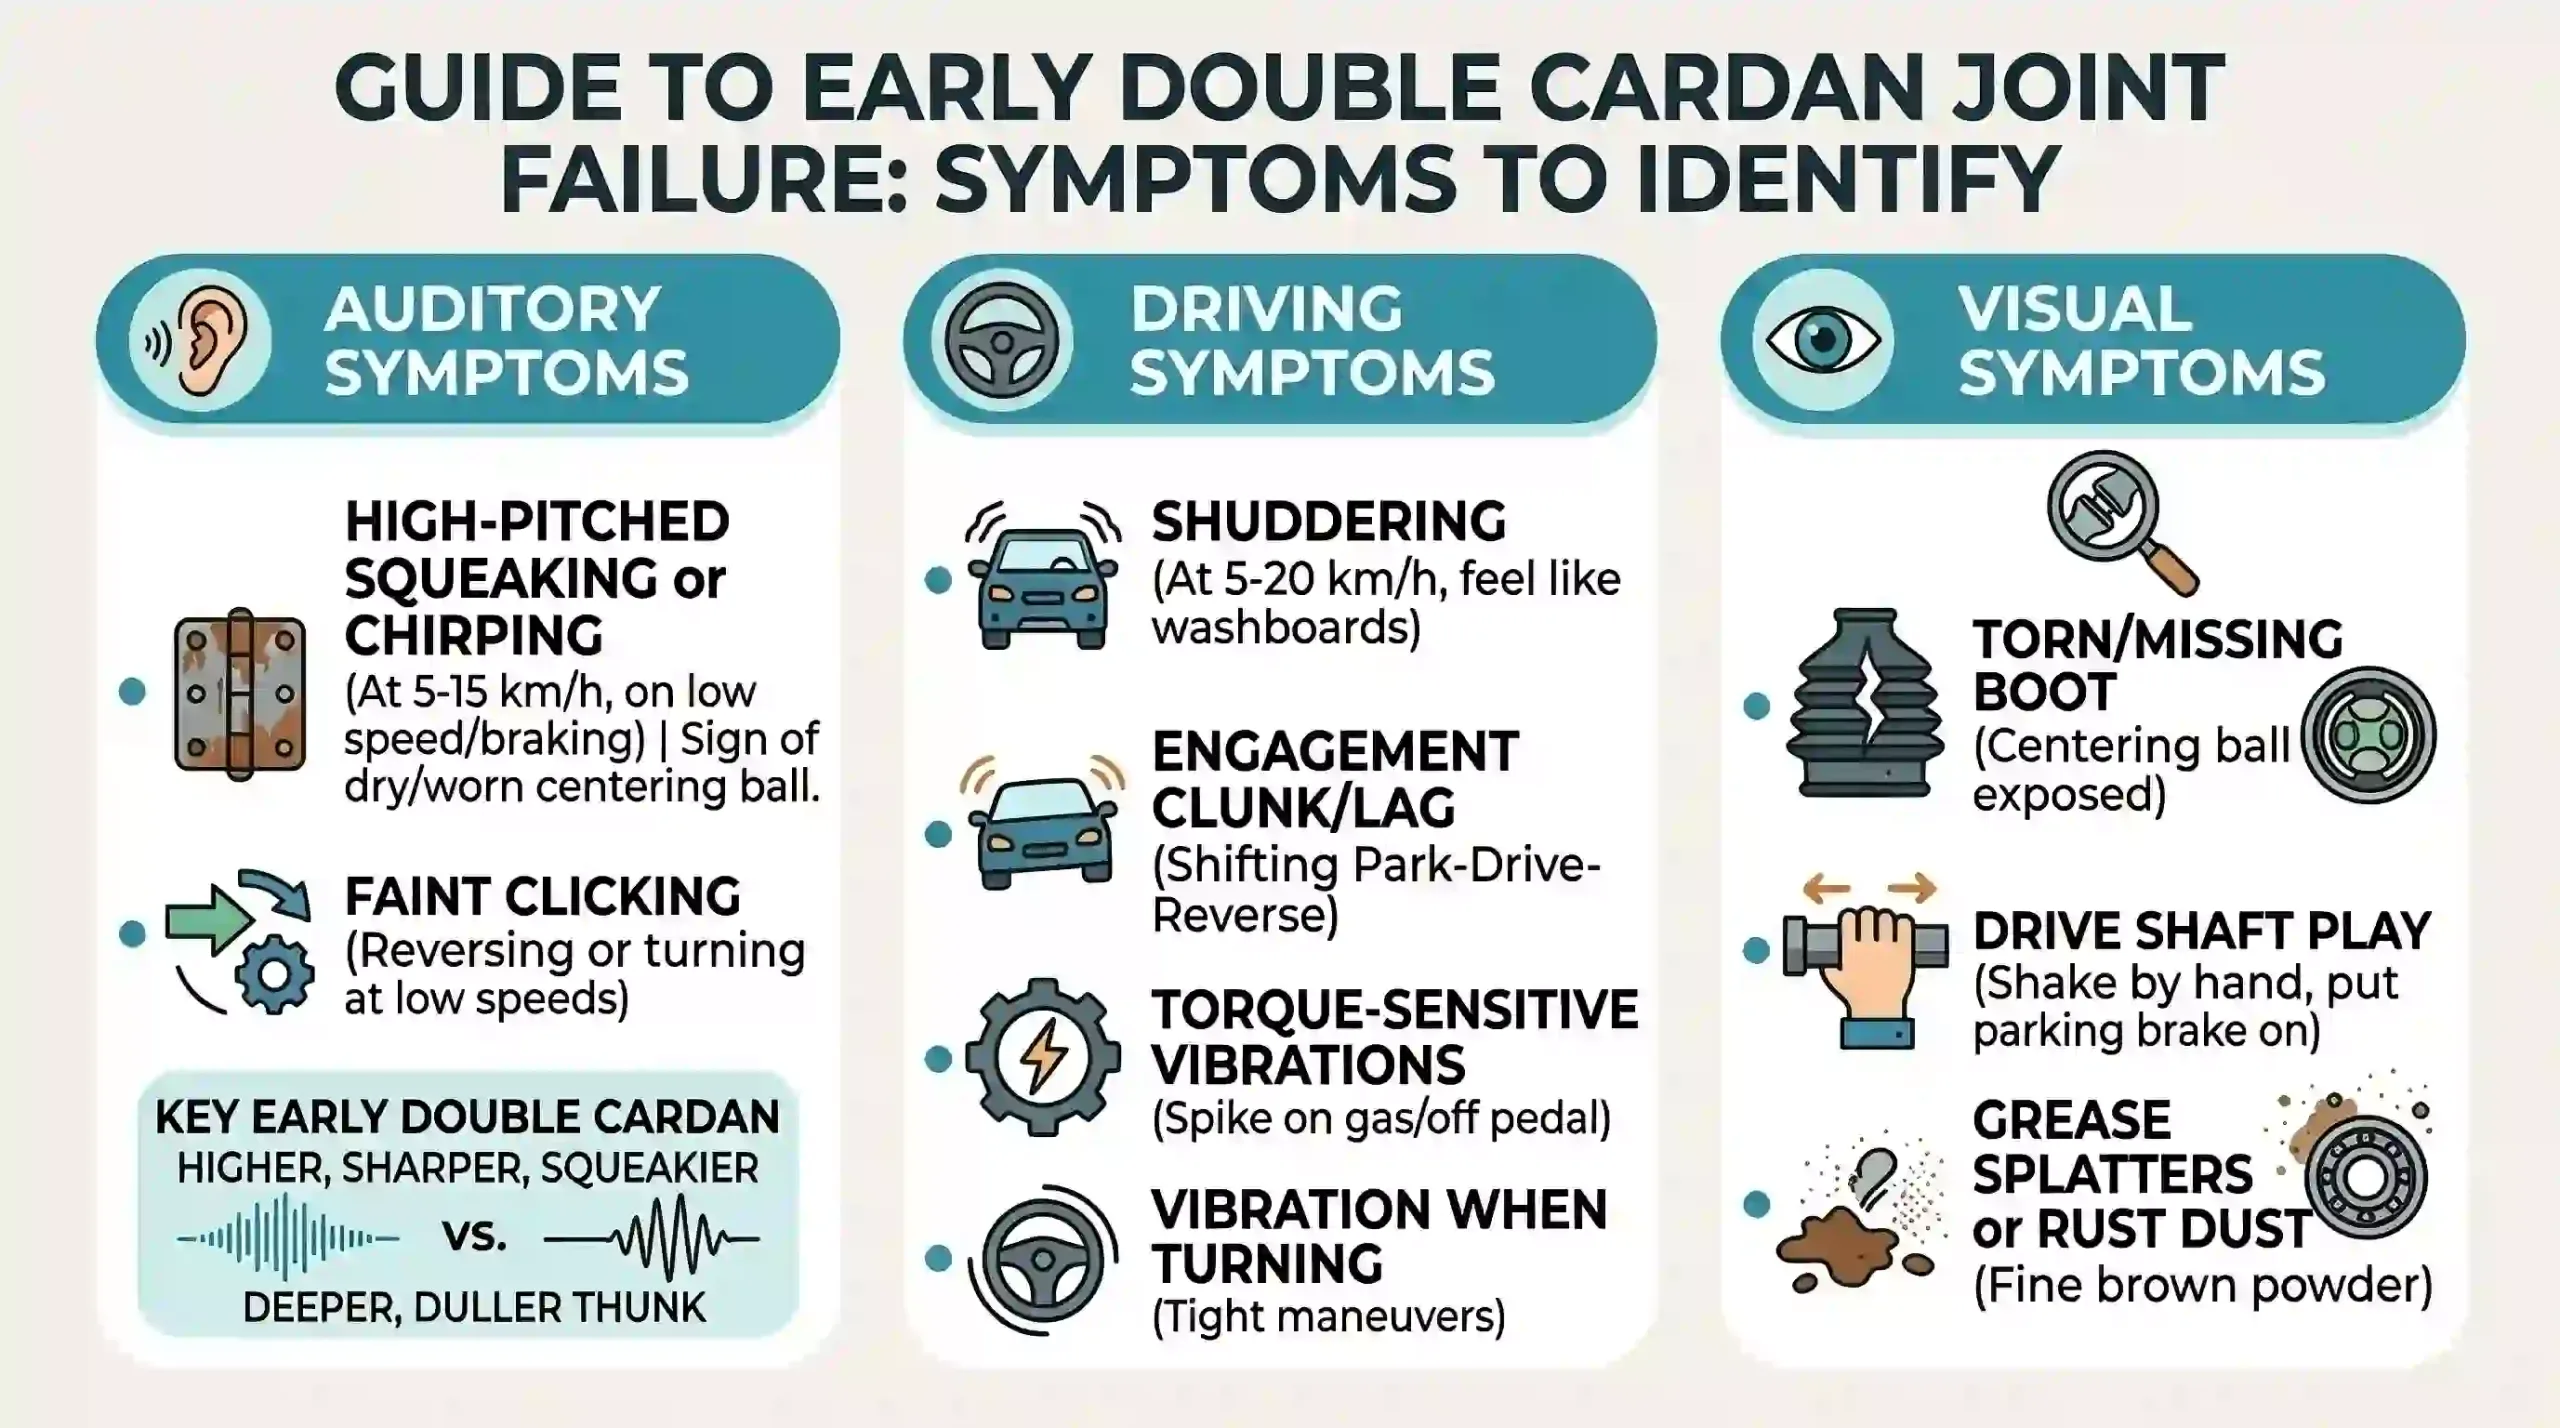
A failing double cardan joint gives off distinct warning sounds early on. Pay attention to these specific noises:
- High-pitched squeaking or chirping at low speeds: If you hear a sound like a rusty hinge or metal rubbing rubber at 5-15 km/h (or right when you release the brakes), it means the centering ball of your double cardan joint is running dry or already worn.
- Faint clicking when reversing or turning at low speeds: This is common in parking lots but usually disappears once you speed up.
- The sound distinction: A failed standard U-joint usually makes a deep, dull thunk when starting or stopping. Early double cardan failure sounds much higher, sharper, and squeakier.
Driving Symptoms
You may also feel a failing joint through changes in how your vehicle drives:
- Shuddering or hesitation under low-speed acceleration: If your truck feels like it is driving over washboards at 5-20 km/h on a perfectly smooth road, the centering ball is likely worn, causing uneven angles between the shaft segments.
- Engagement clunk or lag: Shifting from Park to Drive or Reverse might feel sloppy or cause a muffled clunk, a common issue in two-piece drive shaft trucks and SUVs.
- Torque-sensitive vibrations: The ride might feel smooth under light throttle, but vibrations spike when you step on the gas or let off the pedal completely.
- Vibration when turning the steering wheel: You may feel a distinct shudder during tight, low-speed maneuvers like U-turns or backing into a parking space, which goes away once the wheel is straight.
Visual Symptoms
If you are still unsure, a quick inspection under your vehicle can confirm your suspicions:
-
Torn or missing centering ball boot: Look at the bulge in the middle of the joint. If the rubber boot is split, torn, or gone, dirt has likely destroyed the centering ball inside.
-
Drive shaft play: Put the parking brake on and try to shake the drive shaft by hand. Any noticeable play or clicking means the internal centering ball or U-joints are badly worn.
-
Grease splatters or rust dust: Finding fresh grease flung around the tunnel or fine, brown rust powder around the joint bearings is a clear sign of internal wear.
⚠️Warning: Do not ignore these bad double cardan joint symptoms. Driving with a failed double cardan joint leads to complete centering ball failure, massive vibrations, and ruined transfer cases or differentials. In worst-case scenarios, the joint can snap at highway speeds, dropping the drive shaft and causing a total loss of vehicle control.
Top Causes of Premature Double Cardan Failure
With correct use and maintenance, double cardan joints are built to last over 100,000 km, and top-quality ones can reach 200,000 km without issues. Yet many drivers face early failures after only tens of thousands of kilometers, especially on Toyota Land Cruisers, Prados, and other vehicles. This is rarely a design flaw, but stems from the following causes.
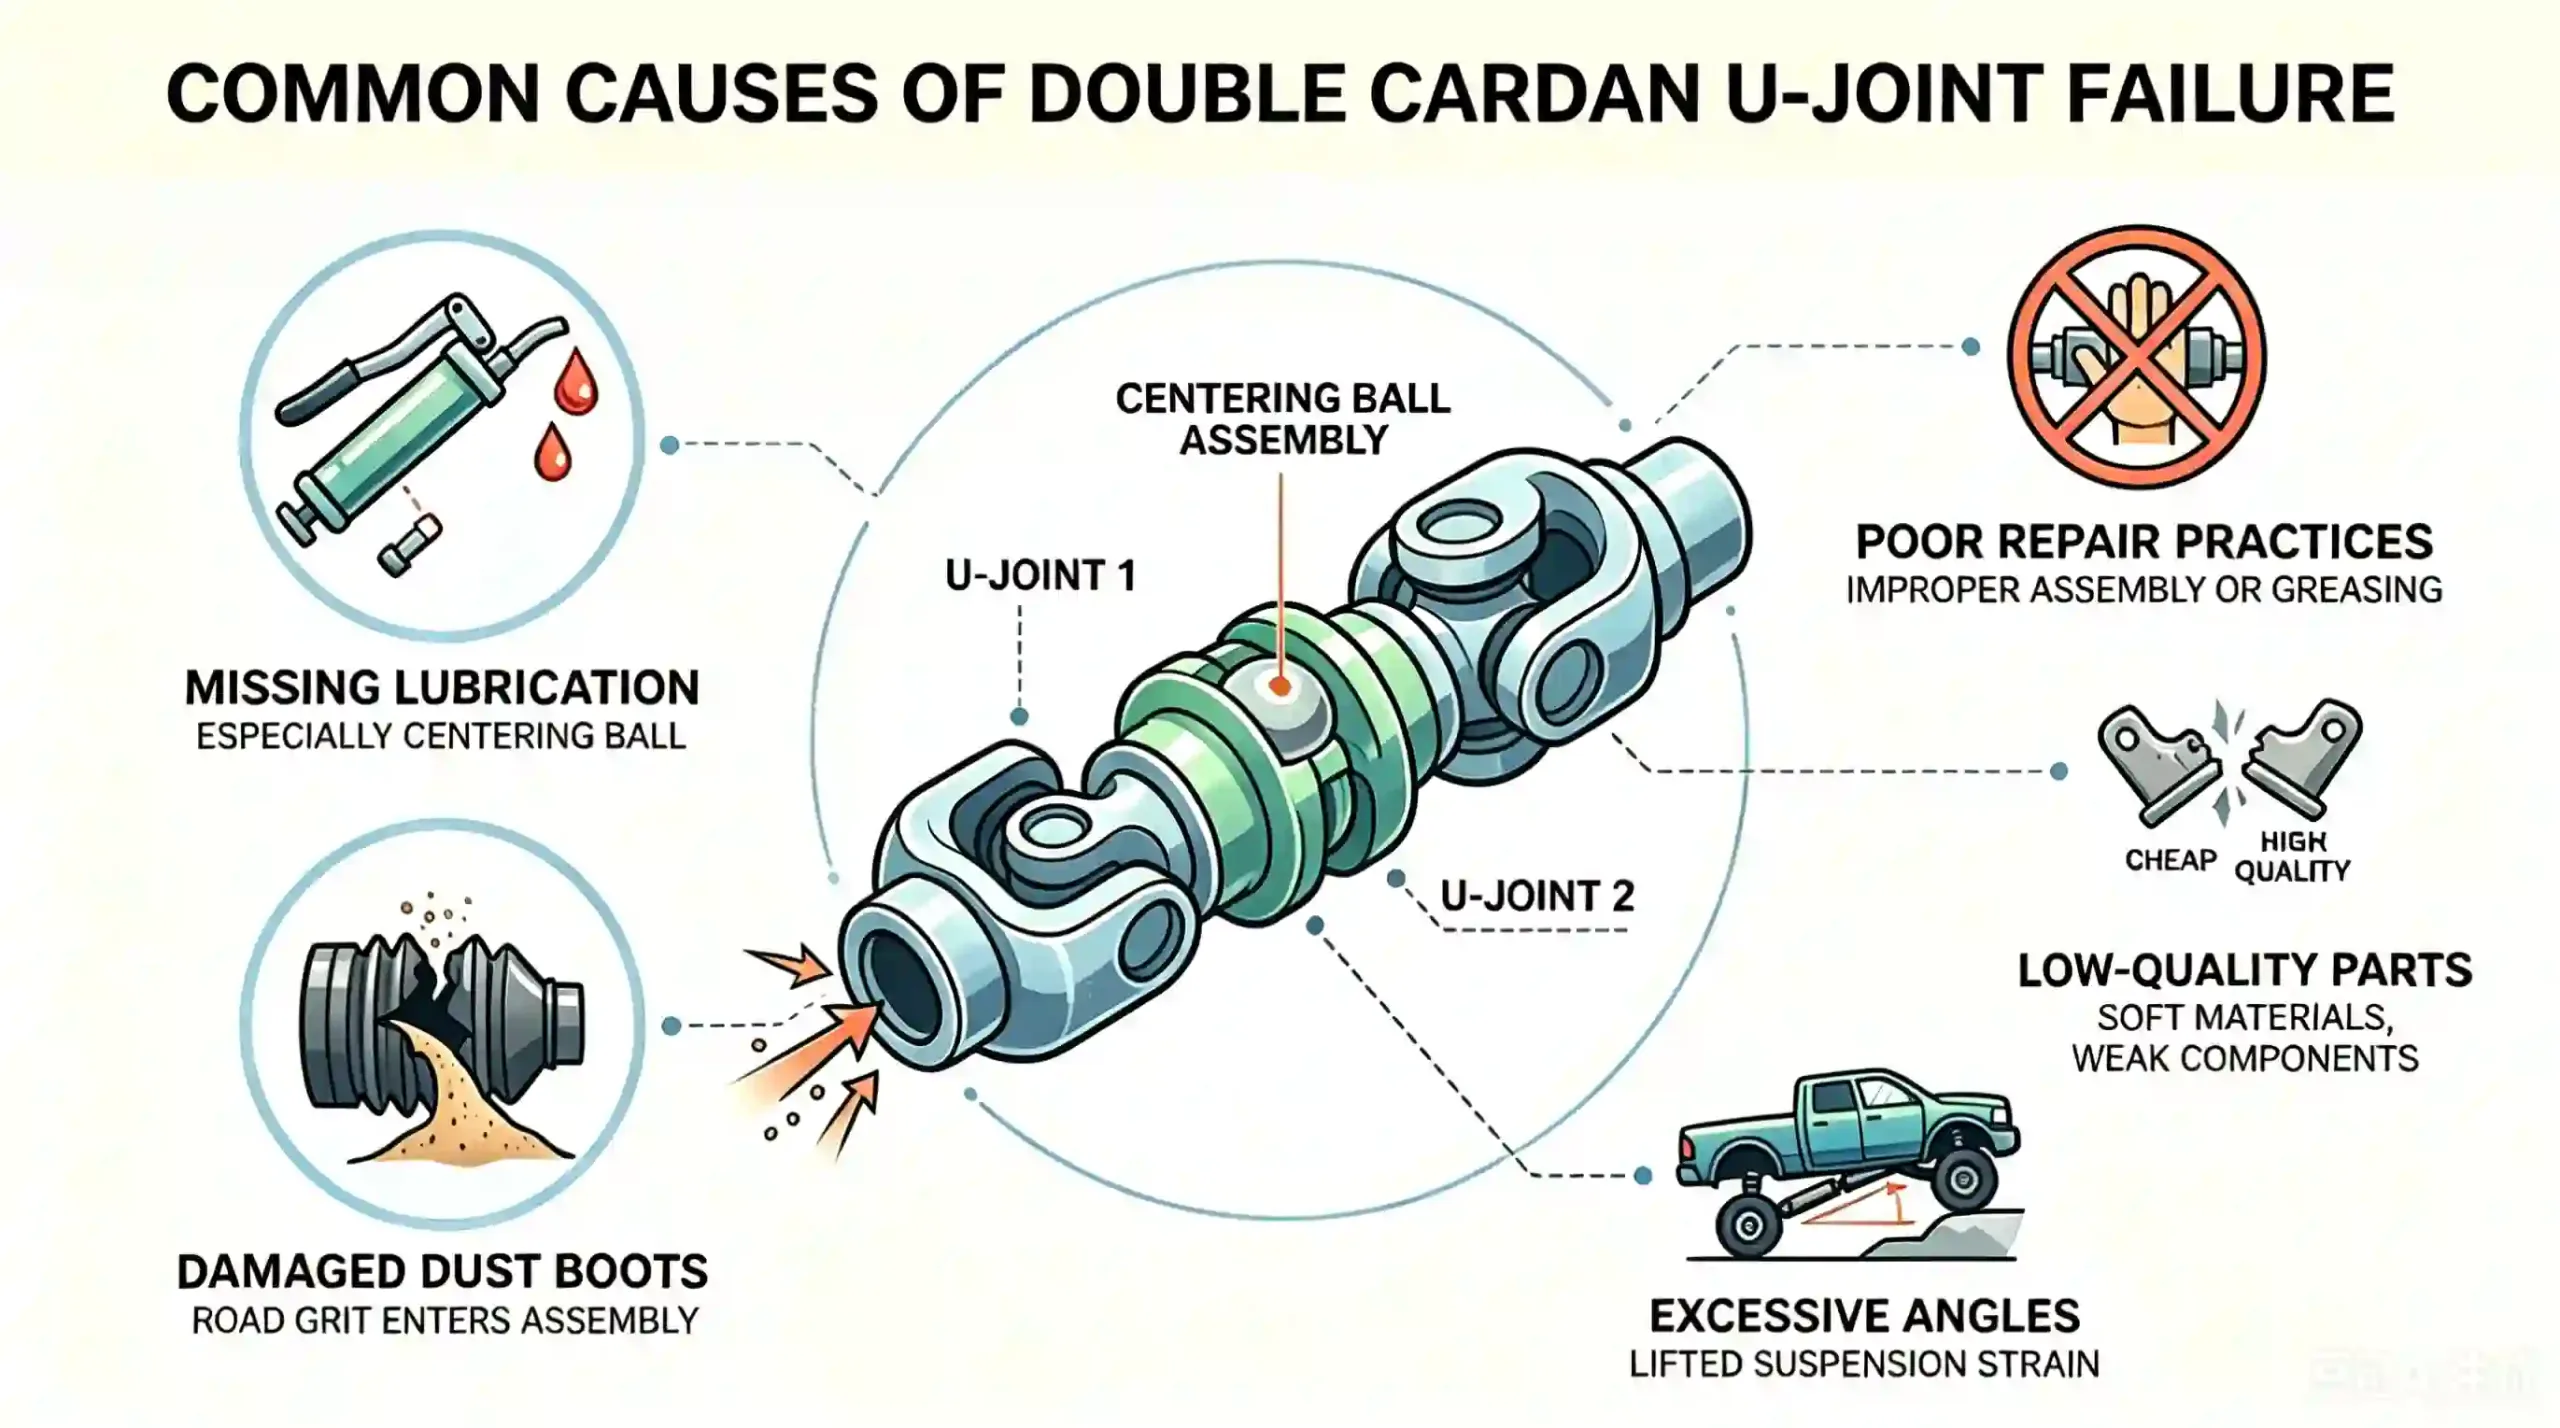
- Lack of lubrication: A typical double cardan u-joint assembly has multiple grease points (two U-joints and one centering ball). Mechanics frequently miss the centering ball zerk fitting during routine maintenance.
- Damaged dust boots: Once the rubber boot tears, road grit enters the centering ball assembly, grinding down the ball socket and internal spring.
- Excessive operating angles: Lifting a suspension without correcting the drive shaft geometry forces the joint to run at its absolute limits, accelerating wear.
- Poor repair practices: Forgetting to grease the centering ball during a U-joint replacement or installing the components backward will cause rapid failure.
- Low-quality parts: Cheap spare parts are fitted with soft center balls and mismatched spring preload. A good double cardan joint manufacturer uses precision components that prevent early failure and keep your driveline running smoothly.
Fixing a Failing Double Cardan Joint: DIY or Pro?
A complex double cardan universal joint is much trickier to repair than regular universal joints. Thanks to their internal center balls and spring assemblies, they require extremely precise installation. Learn how to choose wisely between DIY repair and professional service before you get started.
How to Decide: DIY or Shop Repair?
Before grabbing your tools, use this checklist to decide if you should handle this repair at home or take it to a specialist.
When to DIY:
- You have replaced regular universal joints proficiently and are skilled in using a bench vise and shop press.
- The component is only slightly loose while the centering ball socket remains in good condition.
- You have 3 to 5 hours of spare time and no urgent demand for the vehicle.
- You own an official maintenance manual or trustworthy step-by-step tutorial guides.
When to Take It to a Professional:
- The joint assembly is severely rusted and cannot be disassembled even under strong force.
- The centering ball is damaged or filled with dirt, as its installation needs extremely strict fitting standards.
- You do not have a vice or a hydraulic press. Improper knocking tools will easily deform the yoke parts.
- The driveshaft needs dynamic balancing since double cardan structures are highly sensitive to balance errors.
- You have no practical experience with vehicle drivetrain maintenance.
How to Rebuild a Double Cardan Joint (Step-by-Step)
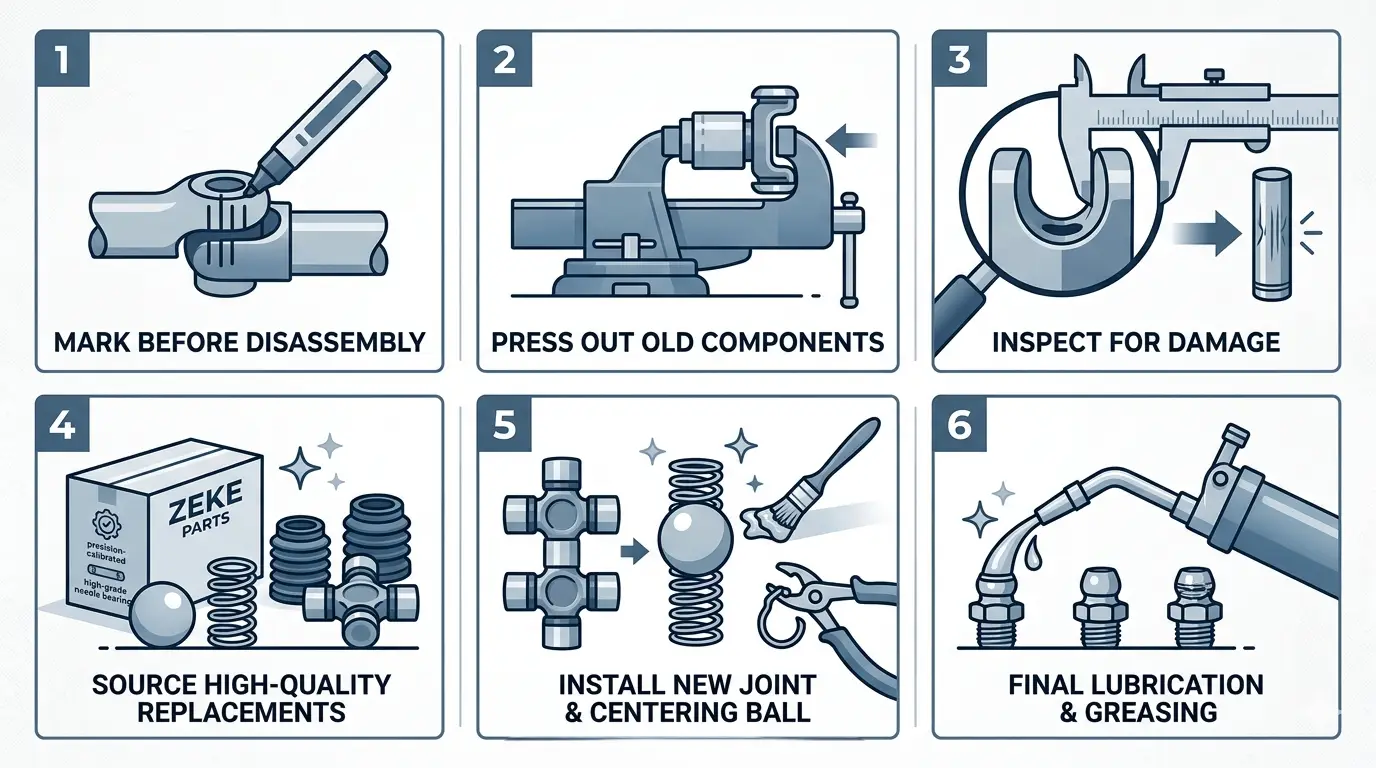
If you have the tools, experience, and patience, follow this step-by-step rebuilding process:
Step 1. Mark the Shaft before Disassembly
Before removing the drive shaft from the vehicle, use a paint pen or scribe to mark the exact alignment of the flange to the yoke. If you do not align these marks during reassembly, the shaft will be out of balance and vibrate at high speeds.
Step 2. Press out the Old Components
Use a hydraulic press or a heavy-duty bench vise with matching sockets to press out the old U-joints. Never hit the yoke ears with a hammer, as bending them even slightly will ruin the entire drive shaft. Use snap-ring pliers to remove the internal clips, and cover the centering ball with a shop rag when pulling it apart, so the internal spring does not fly across the room. Clean out all old grease, grit, and rust.
Step 3. Inspect for Structural Damage
Check the yoke ears for oblong wear and check the centering ball pin for scoring. If the pin is grooved or worn down, replacing just the soft components will not fix the play; you will need a new weld yoke or shaft assembly.
Step 4. Source High-Quality Replacements
Confirm that your rebuild kit includes the center ball spring, dust boot, and all grease fittings. Cheap kits skip these items, which leads to high return rates. For professional mechanics, Zeke Parts double cardan joints are a more dependable choice. The centering ball is precision-calibrated and uses high-grade needle bearings. This stops vibration and noise at the source and reduces your after-sales issues. We provide sample testing. You can test a sample to verify fitment and quality before bulk ordering. This lowers your risk when choosing parts.
Step 5. Install the New Joint
Install the two new U-joints first, followed by the centering ball assembly. Press the U-joint caps into the yoke until the snap-ring grooves are fully exposed, ensuring the grease fittings face the drive shaft body for easy access later. Coat the centering ball and socket thoroughly with high-temperature, extreme-pressure lithium grease before pressing it into place, making sure the spring stays perfectly seated. Snap all retaining clips completely into their grooves; loose clips are a major cause of post-repair noise.
Step 6. Final Lubrication
Hook up a grease gun to all three fittings and pump in grease until fresh, clean lubricant just starts to purge from the rubber seals. This ensures no air pockets are trapped inside the bearings.
If these steps sound straightforward and you have a shop press, this is a manageable weekend project. If managing flying springs and high-tolerance press fits sounds overwhelming, save yourself the headache and take the shaft to a professional driveline shop. A ruined drive shaft costs far more than a couple of hours of shop labor.
Pro-Tips for Long-Term Driveline Health
Making your double cardan joint last for years is easy if you practice a few regular maintenance habits:
- Grease it every 5,000 km: Give the U-joints and the centering ball fresh grease every 5,000 kilometers, or immediately after any off-road trip involving deep mud or water crossings. Toyota service manuals explicitly require this interval. Ignoring it is the number one cause of premature centering ball failure.
- Inspect the dust boot regularly: Every time you change your engine oil, take a look under the truck to make sure the centering ball rubber boot remains intact and flexible.
- Correct your drive shaft angles: After a suspension lift, do not align the pinion directly with the driveshaft. For a double cardan joint, use axle shims or adjustable control arms to set the pinion angle 1 to 3 degrees below the driveshaft angle. This offset is required for smooth operation.
- Avoid sustained extreme loads: Limit high-speed driving when your vehicle is fully loaded to its weight capacity, and avoid spinning your tires hard on high-traction surfaces when the suspension is fully flexed.
- Replace your mounting hardware: Drivetrain bolts stretch over time. After removing your drive shaft twice, replace the old locking nuts and bolts with fresh, high-grade hardware.
The Bottom Line
Catch double cardan joint failure early by watching for low-speed chirping, acceleration shudders, or a torn dust boot. Ignoring these signs can crack your transfer case and double your repair costs. Early failure usually comes down to poor lubrication, a torn boot, or incorrect suspension lift angles.
DIY repair is possible if you own a press, have changed U-joints before, and the yoke is undamaged. Otherwise, let a professional handle it. Either way, follow the three Golden Rules: mark alignment before disassembly, fully seat all snap rings, and finish with fresh grease.
For reliable replacements, look for kits that include a precision-calibrated centering ball, high-grade needle bearings, and a complete set of seals. Zeke Parts builds every joint to these specifications, with standard sizes for light-duty to heavy-industrial use and custom options for bulk fleet orders.
Contact Us