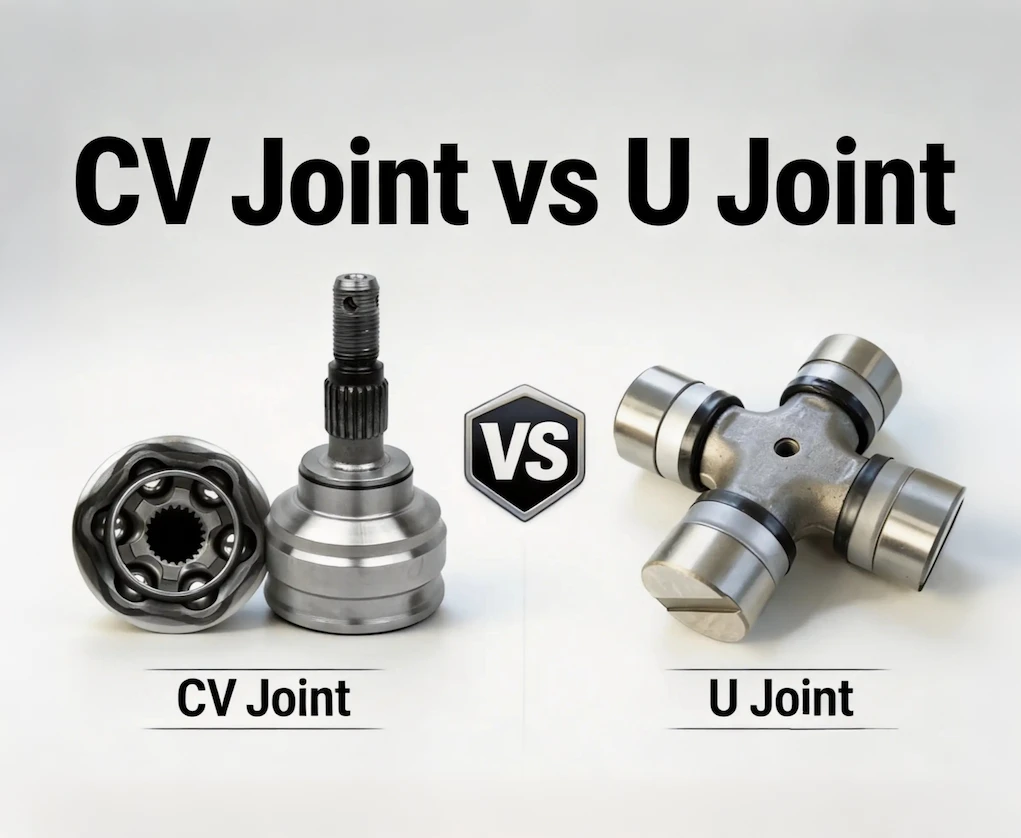

Replacing a U-joint can cost anywhere from under $100 to several hundred dollars, depending on whether you take it to a shop or do it yourself. Shop labor is often the biggest chunk of that bill, and it’s also the part you can skip entirely with basic tools and a few hours in the driveway.
This guide breaks down what U-joint replacement actually costs, walks you through the DIY process step by step, and shows you how to pick the right part for your vehicle. We’ll also cover the warning signs of a failing U-joint, so you know exactly when it’s time to get started.
Table of Contents
How to Check if Your U-Joint is Failing
A U-joint rarely fails without warning. The bad U-joint symptoms typically start with a small, easy-to-ignore noise and gradually turn into something you can feel through the whole vehicle. Here's how to catch each symptom at its stage, from the first faint sound to a hands-on check under the car.
- Listen for early warning sounds.
- Feel for vibrations.
- Do a physical inspection.
- Watch for signs of the severe stage.
Catching a U-joint issue in Stage 1 or 2 means a simple, low-cost fix. Waiting until Stage 4 turns a small part replacement into a much bigger repair bill, and puts you at risk of getting stranded or damaging the surrounding drivetrain. If you notice any of these symptoms, it's worth checking and replacing the joint sooner rather than later.
How Much Does It Cost to Replace U-Joints
The exact cost to replace a U-joint depends on your vehicle's U-joint series, how many joints need replacing, and local labor rates. Heavier-duty trucks generally use larger, pricier joints and take a bit longer to service than lighter vehicles.
Here's a rough breakdown for some of the most common models on the road.
| Vehicle | U-Joint Cost | Labor Cost |
|---|---|---|
Ford F-250 | $50–$90 | $150–$230 |
Jeep Wrangler | $25–$50 | $95–$250 |
Chevy Silverado 1500 | $50–$150 | $160–$300 |
Dodge Ram 1500 | $35–$110 | $140–$280 |
Toyota Tacoma | $50–$110 | $150–$310 |
These figures are estimates only. Actual pricing varies by shop, region, part brand, and the condition of your driveshaft, so use them as a general reference rather than a fixed quote.
How to Replace a U-Joint on a Driveshaft
Replacing a universal joint might seem daunting, but with patience and the right approach, it’s a manageable DIY task. This section walks you through the entire replacement process, from the tools you’ll need to the step-by-step removal, installation, and final reinstallation of the driveshaft.
U-Joint Replacement Tool Checklist
Before you begin, gather the following tools and supplies, and prep your vehicle:
Tools:
- Jack stands
- Chalk or a paint pen
- Wrench or socket set
- Pliers and a flathead screwdriver
- Small torch (optional)
- Penetrating fluid
- Bench vise or heavy-duty ball joint press
- Sockets of varying sizes
- Grease and a grease gun (if the new joint has a Zerk fitting)
- Torque wrench
Preparation steps:
- Park the vehicle on a flat, level surface and elevate it with jack stands.
- Use chalk or a paint pen to mark the driveshaft and mating flange (at the differential) before unbolting anything, so it can be reinstalled in the same phase and balance to prevent vibrations.
- Unbolt the driveshaft straps or bolts.
- Slide the driveshaft out of the transmission.
Removing the Old U-Joint
With the driveshaft out, it's time to press out the worn U-joint.
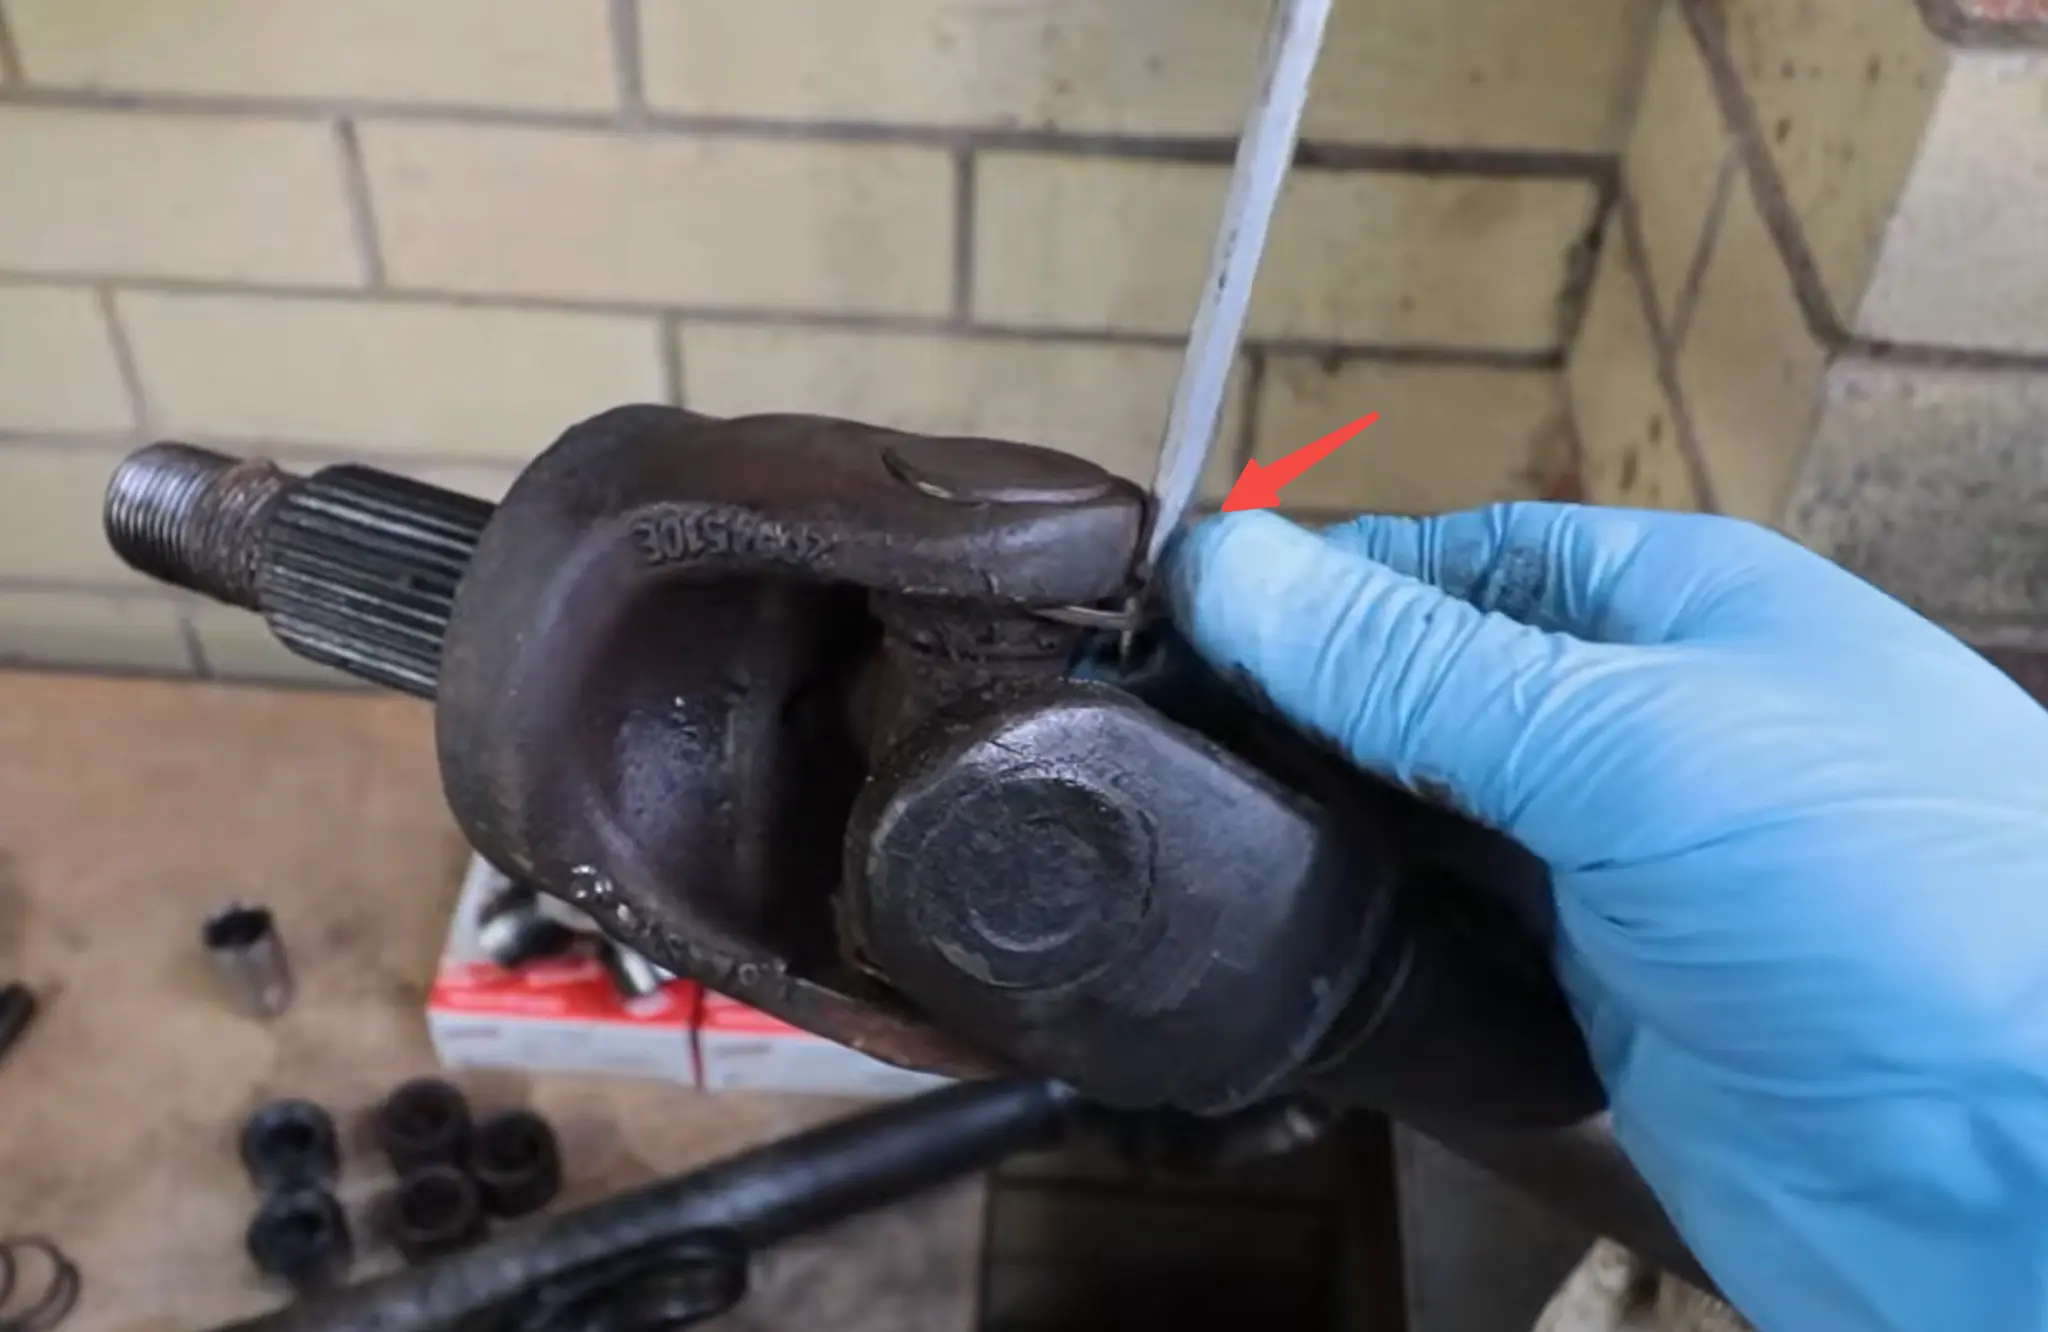
1. Clean the caps and remove all retaining clips (circlips) with pliers or a flathead screwdriver. Use a torch if needed on stubborn factory plastic clips.
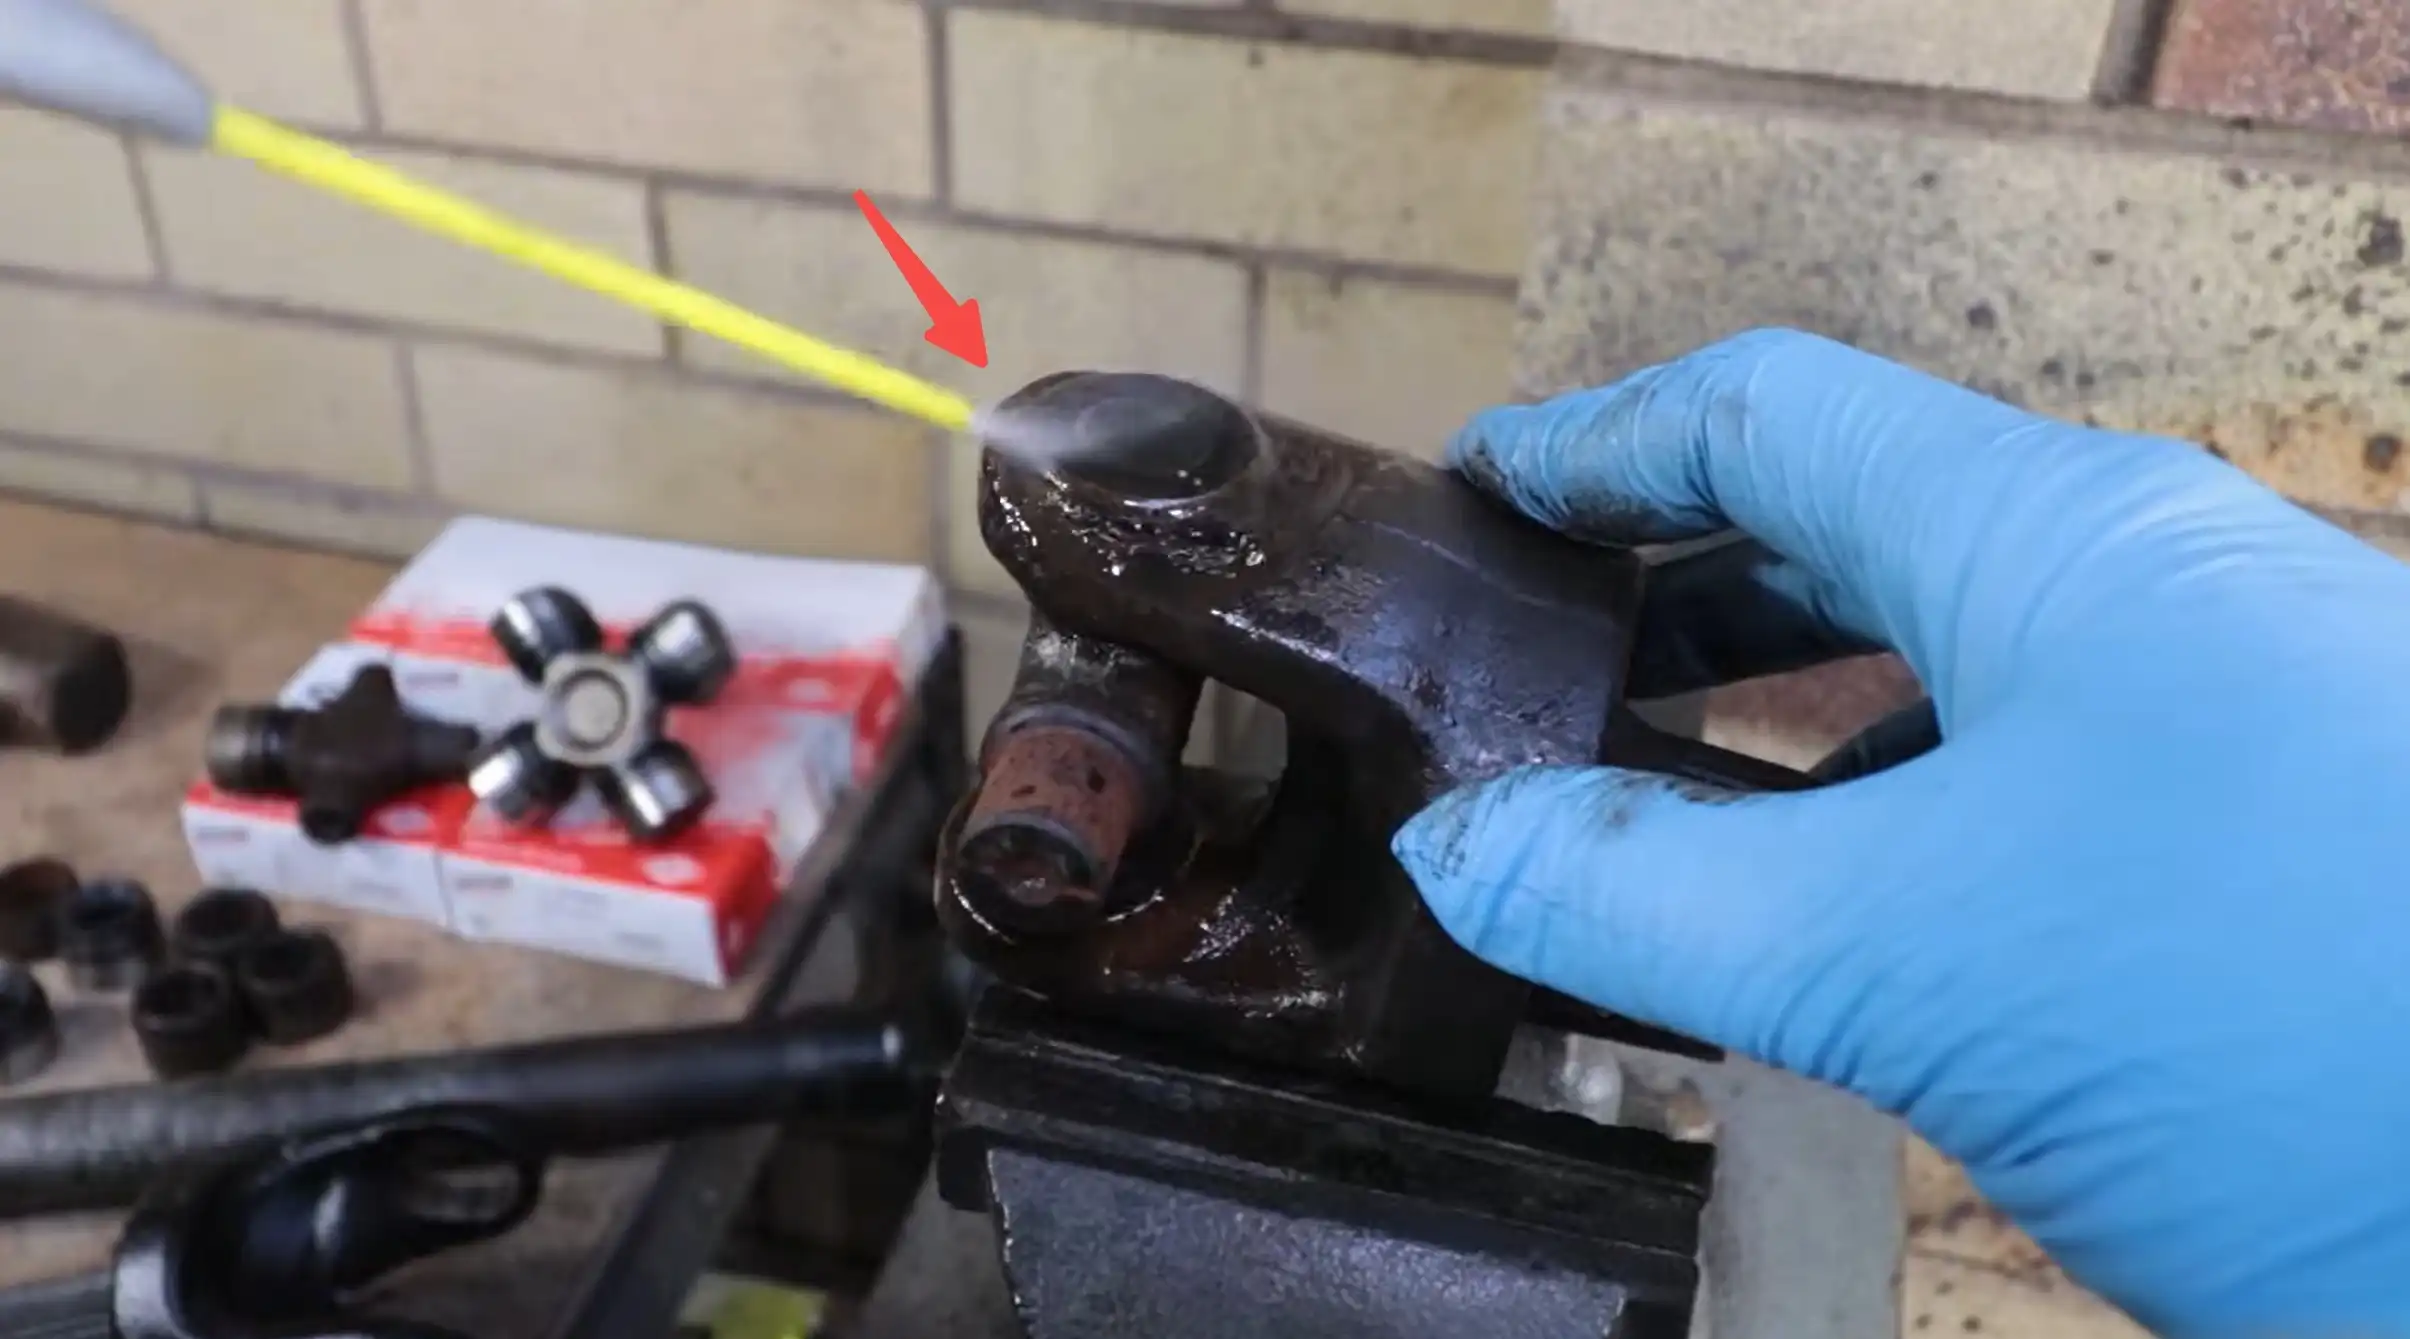
2. Spray penetrating fluid on the bearing caps and let it soak in.
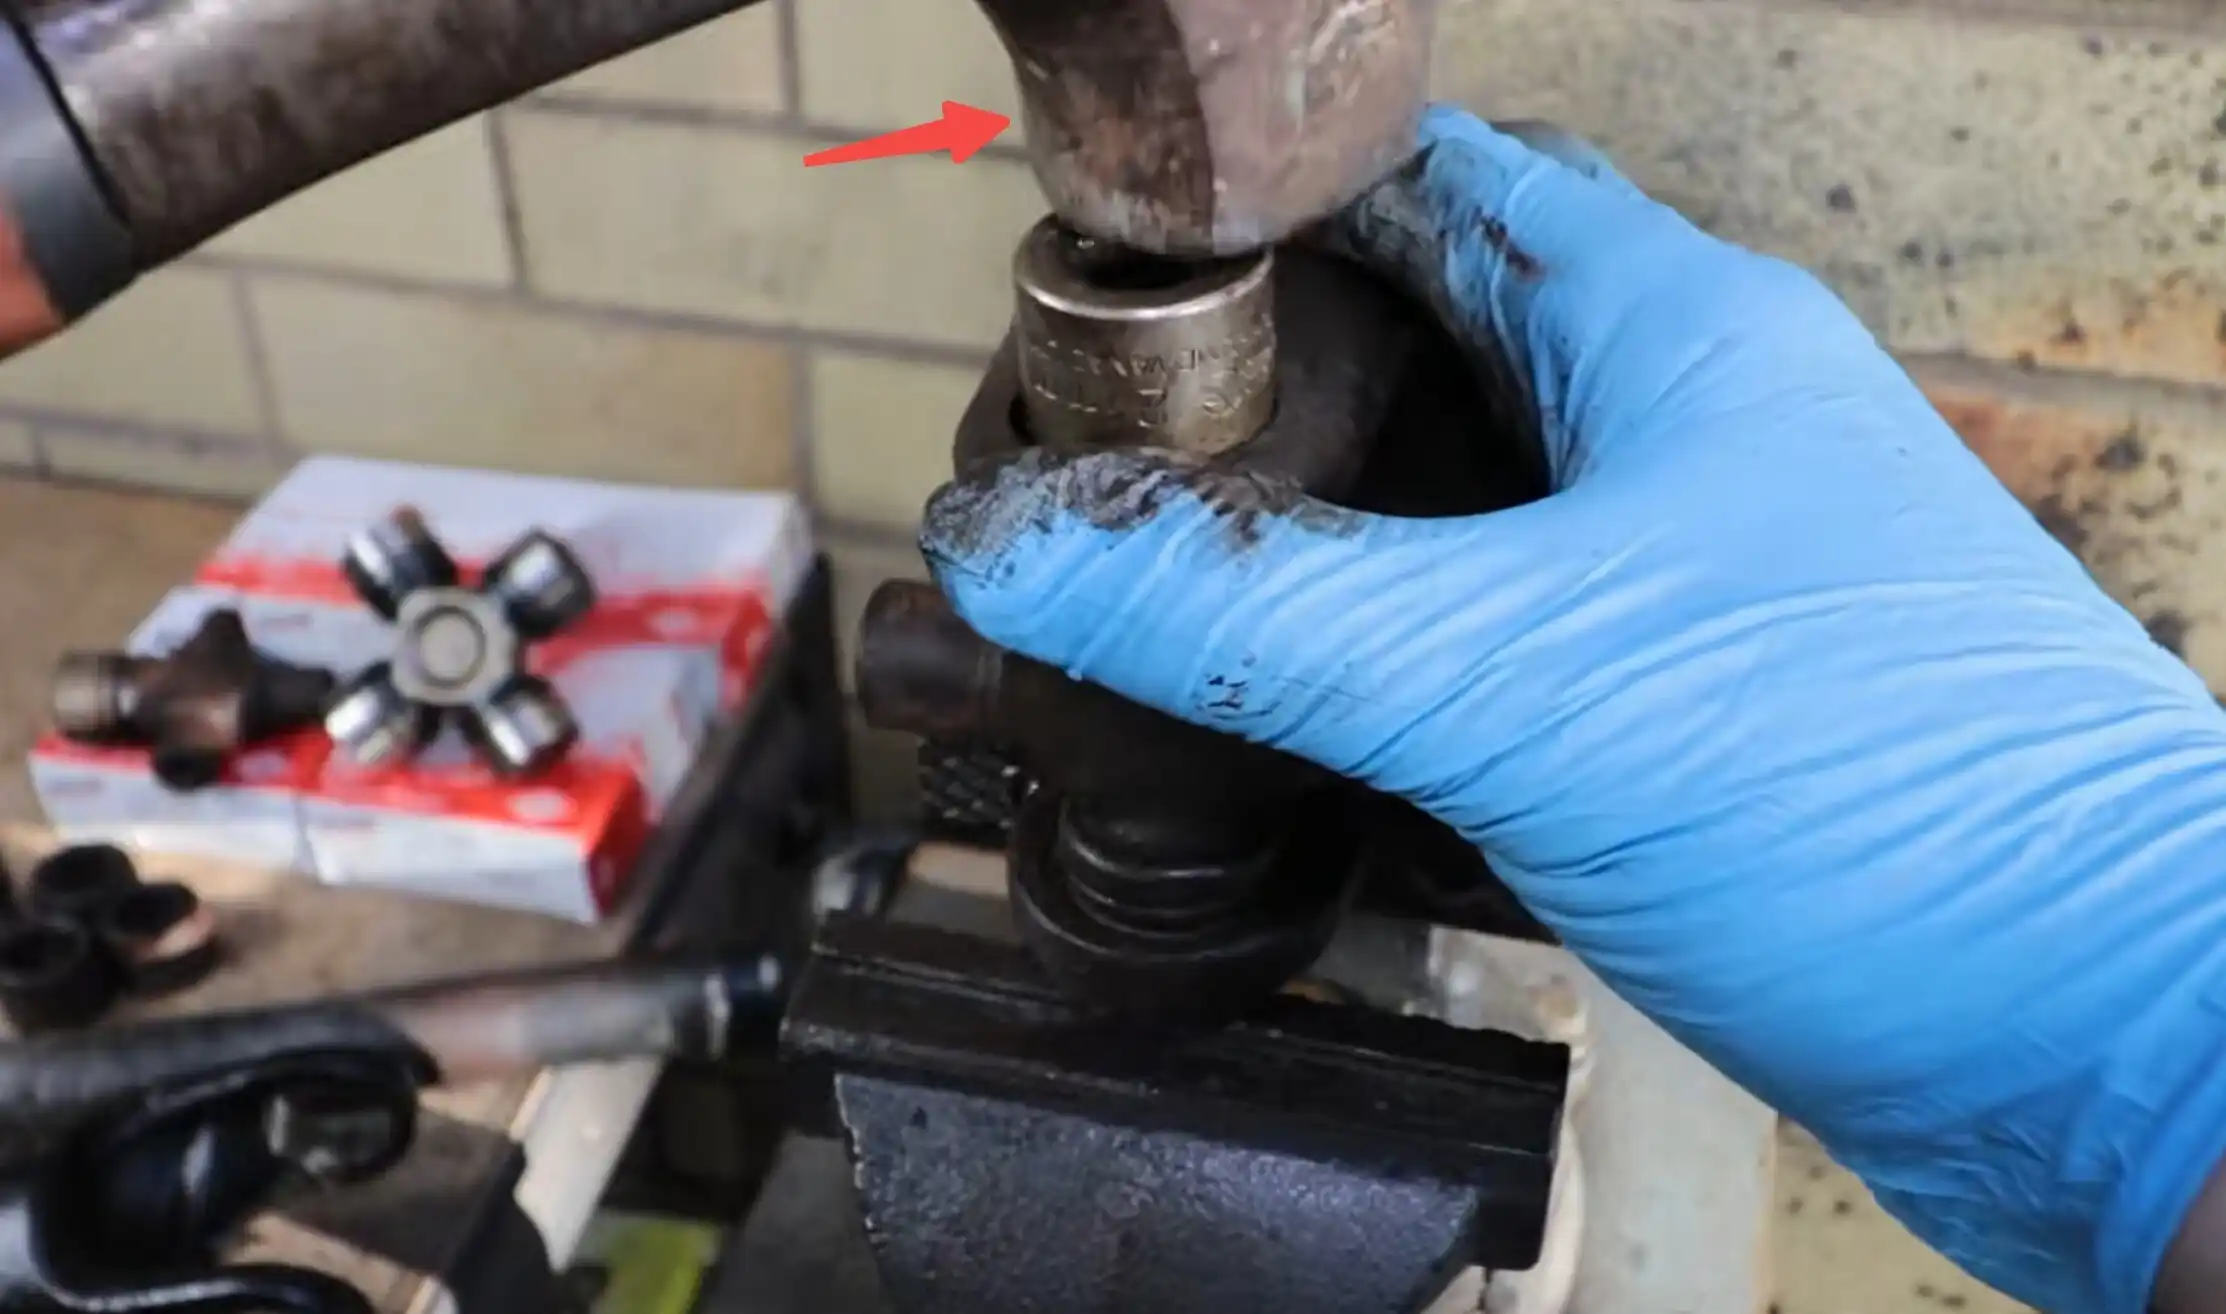
3. Using a bench vise or ball joint press, press the joint from side to side to pop out each cap. Remove them with pliers as they're exposed. Then repeat the process on the other axis of the U-joint.
Installing the New U-Joint
Now fit the new U-joint into the yoke and secure it with fresh clips.
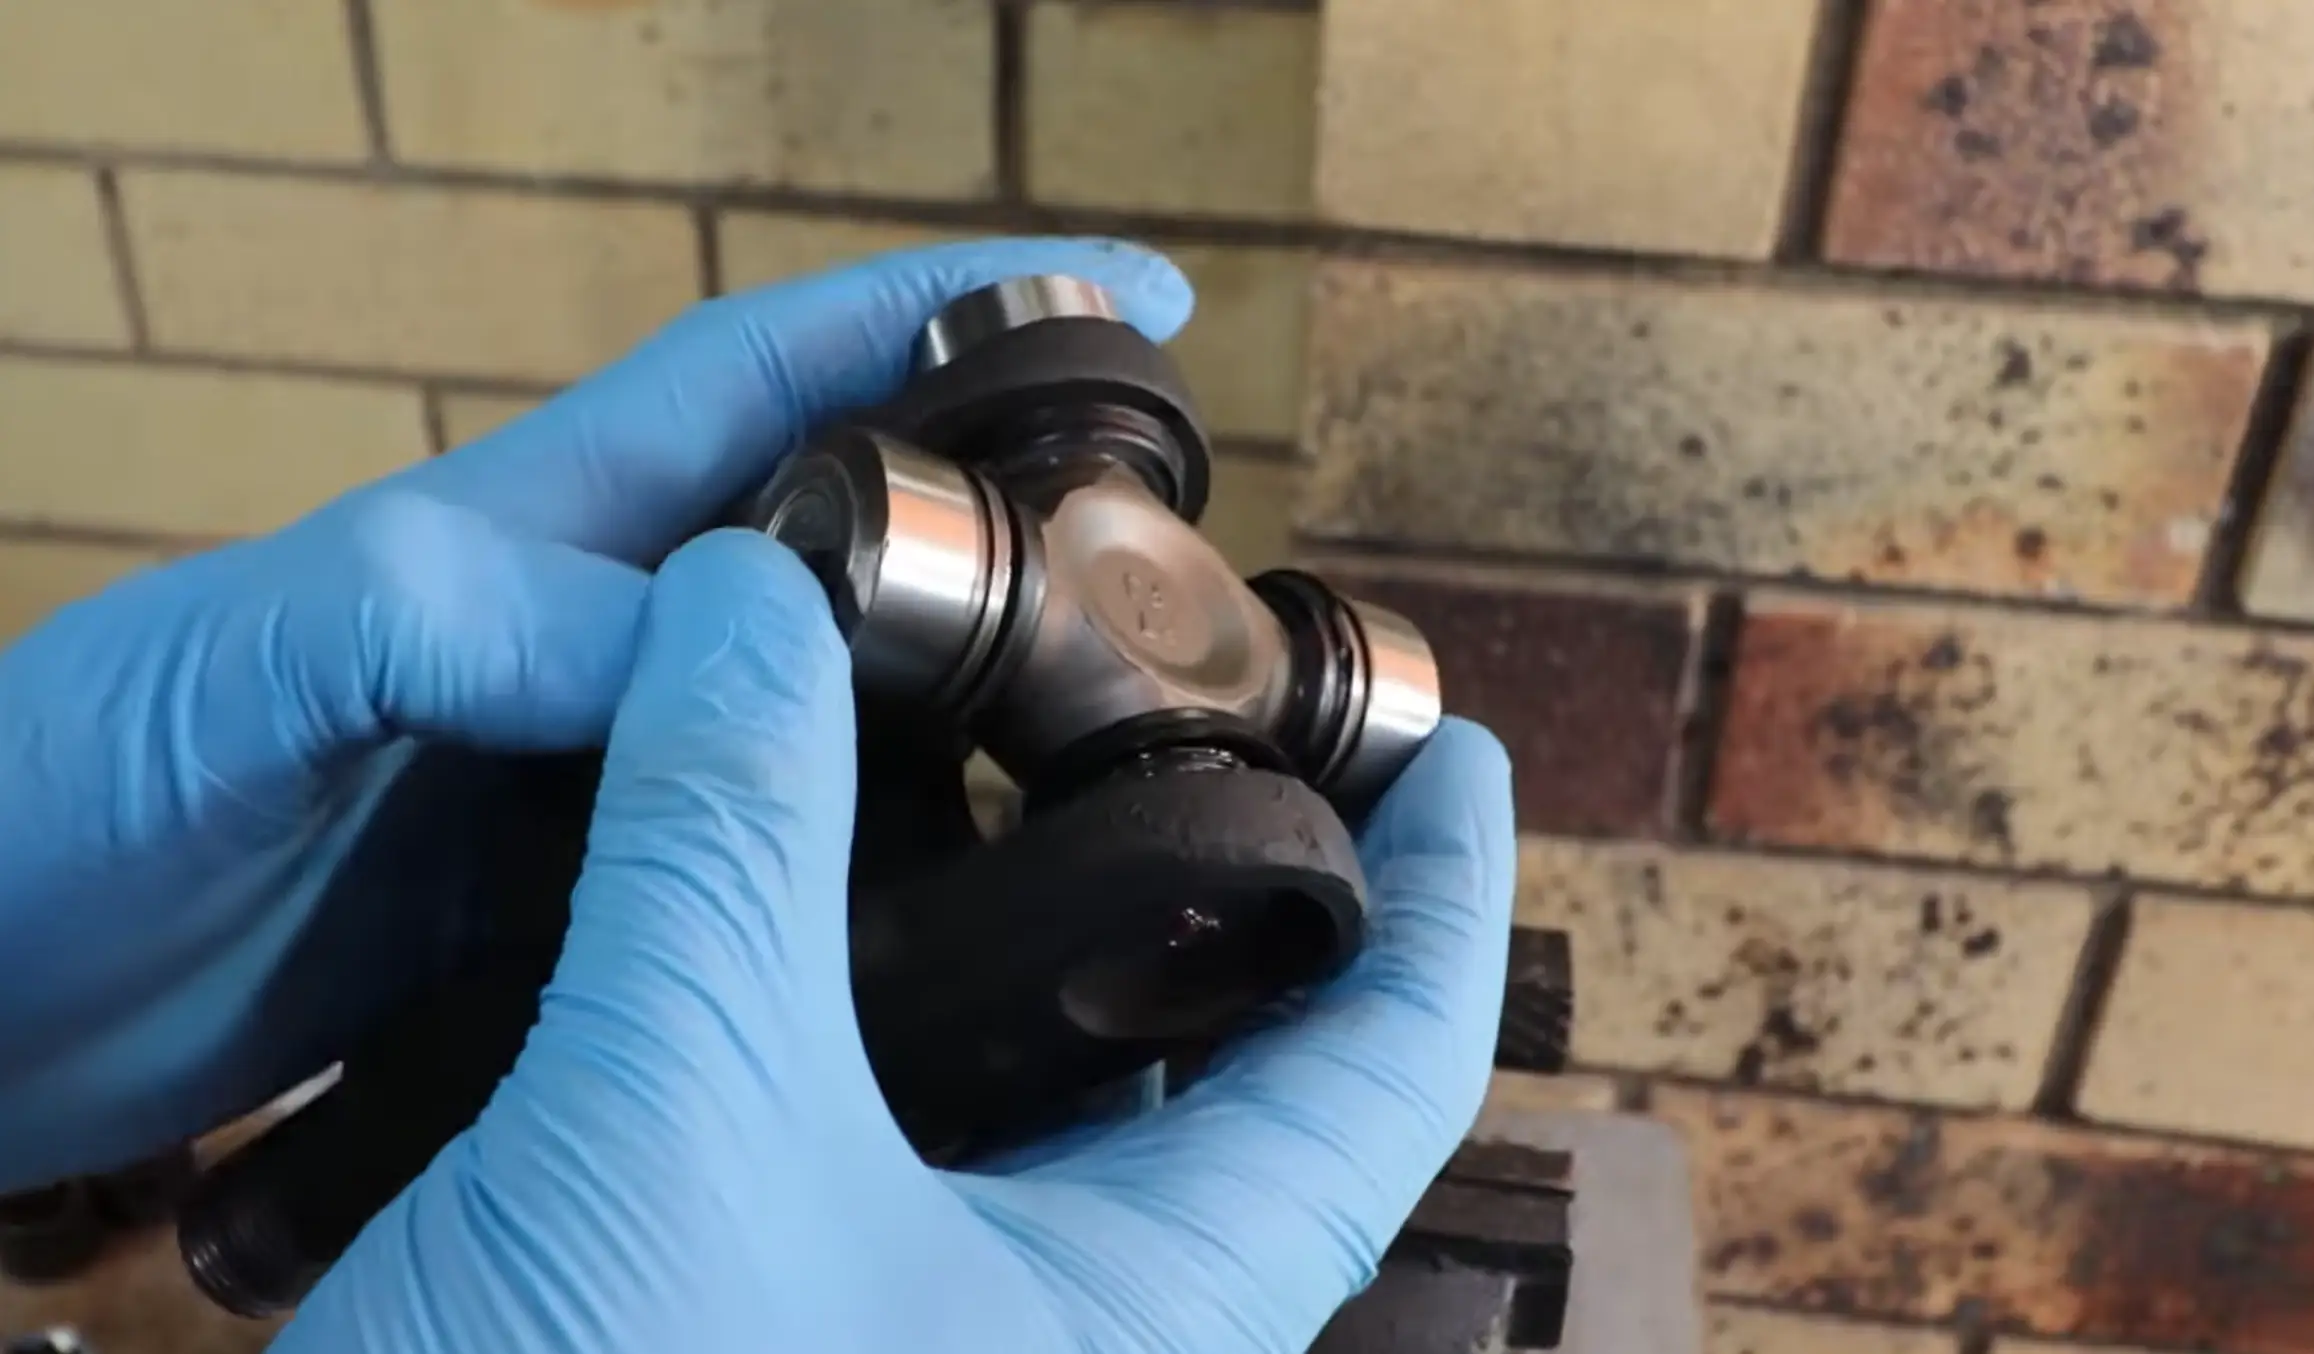
1. Pack the new U-joint's needle bearings with grease and slide the cross (spider) into the yoke.
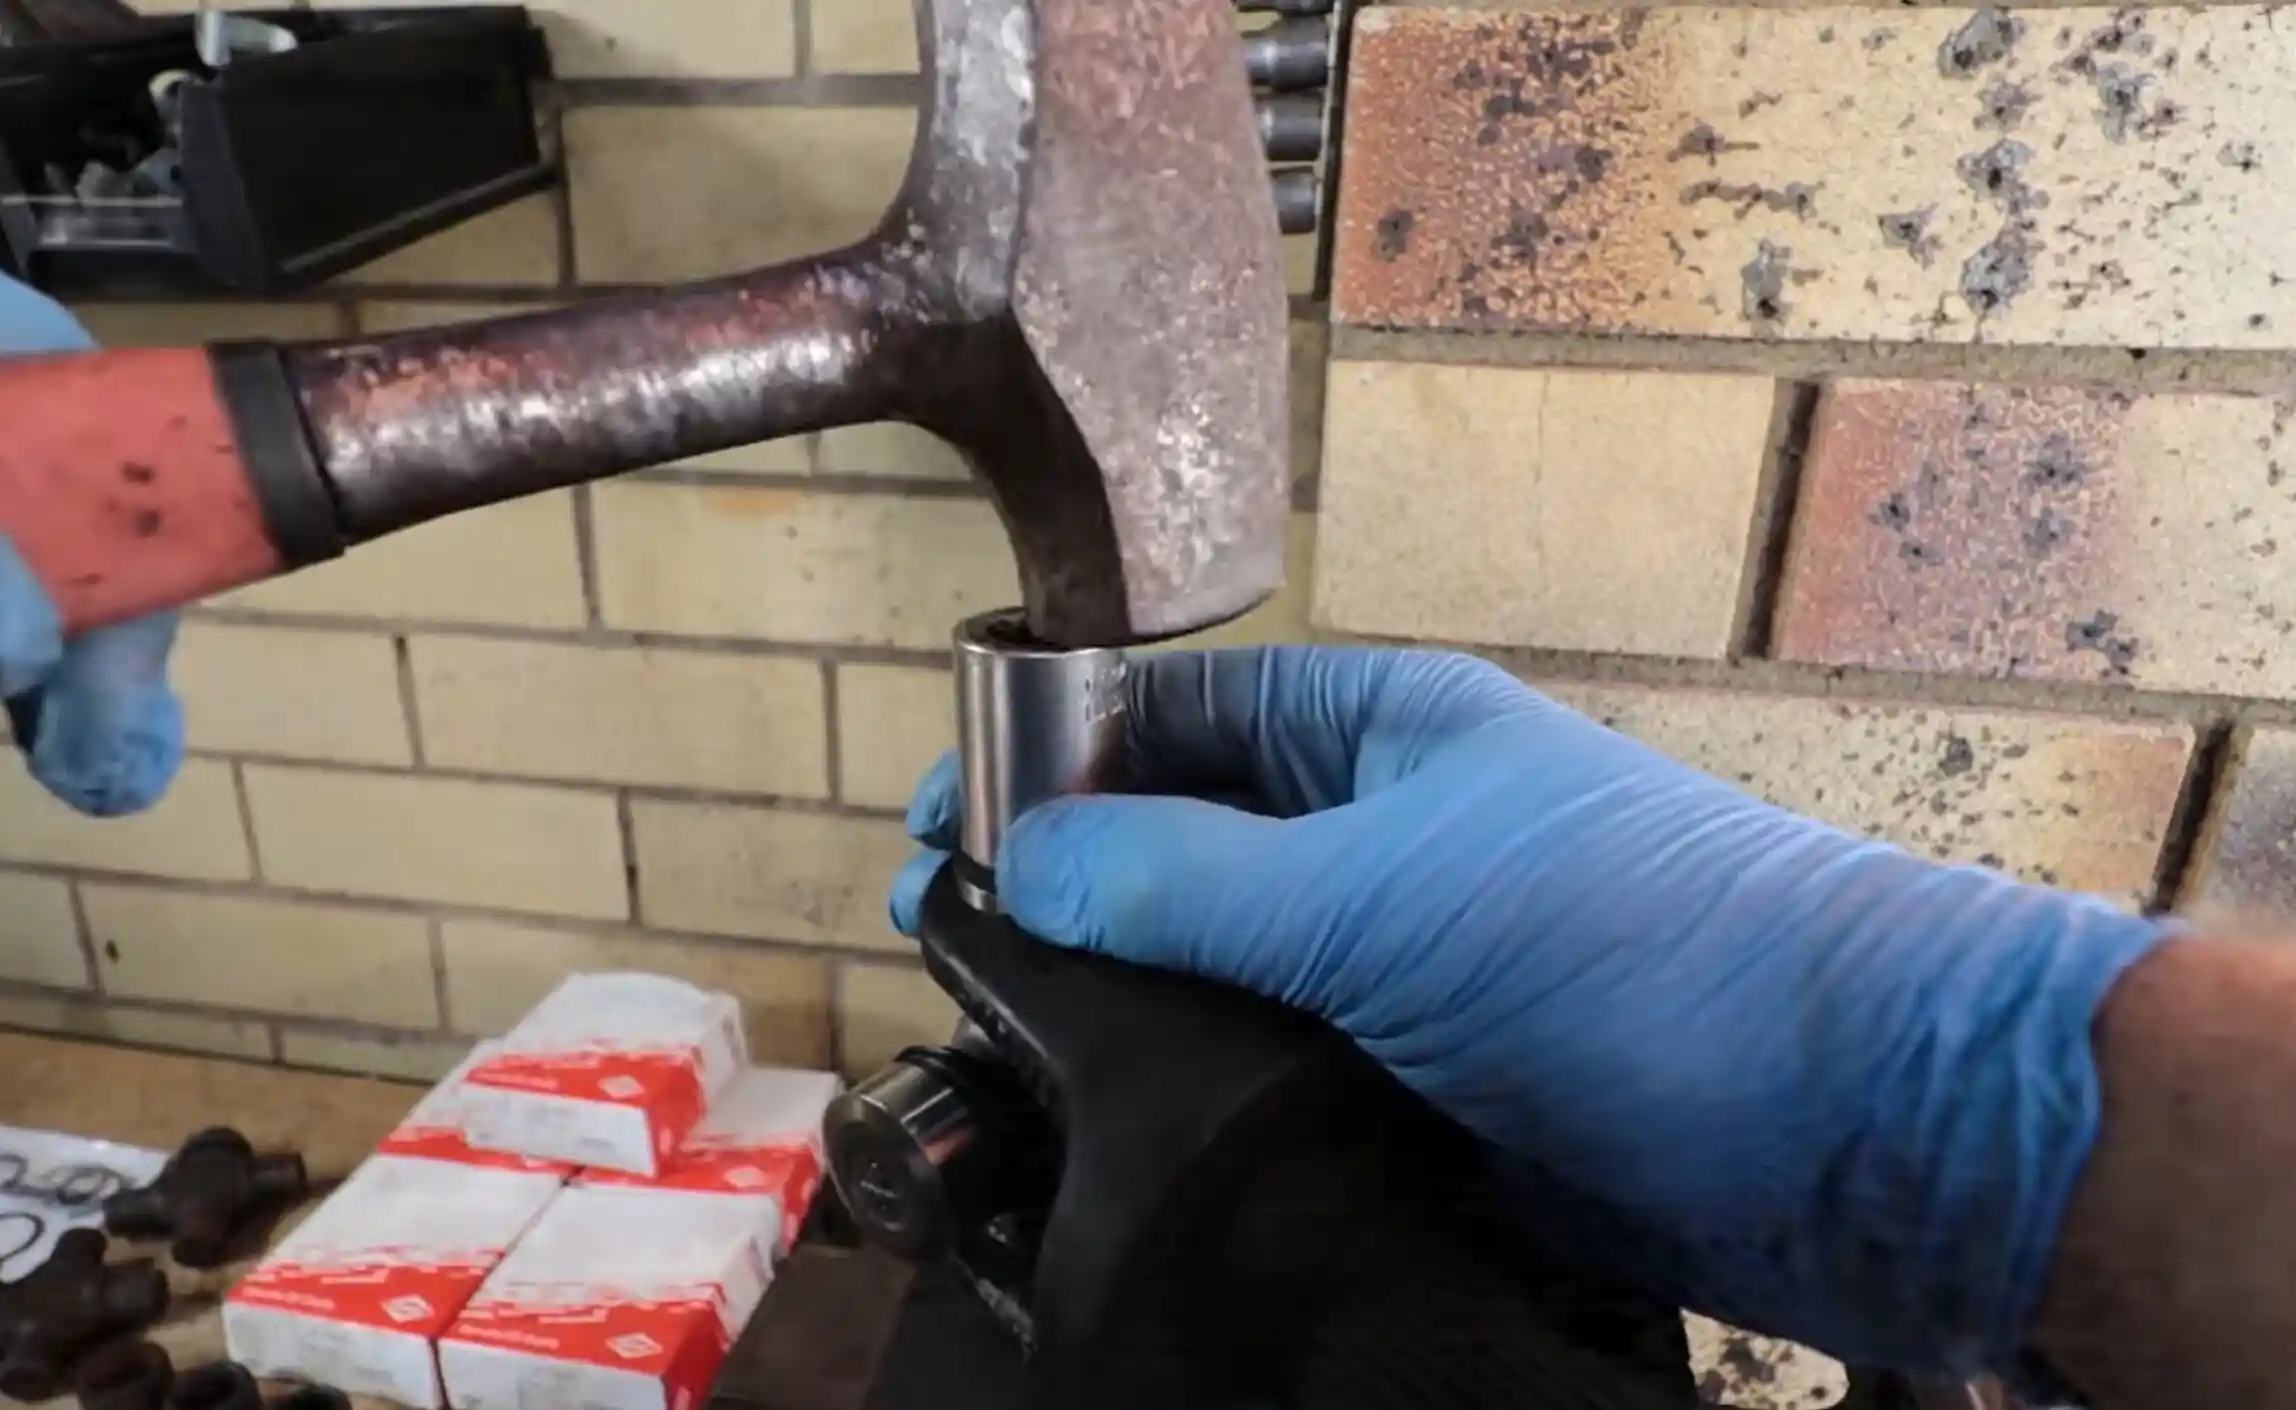
2. Press each cap into place with a socket slightly smaller than the cap.
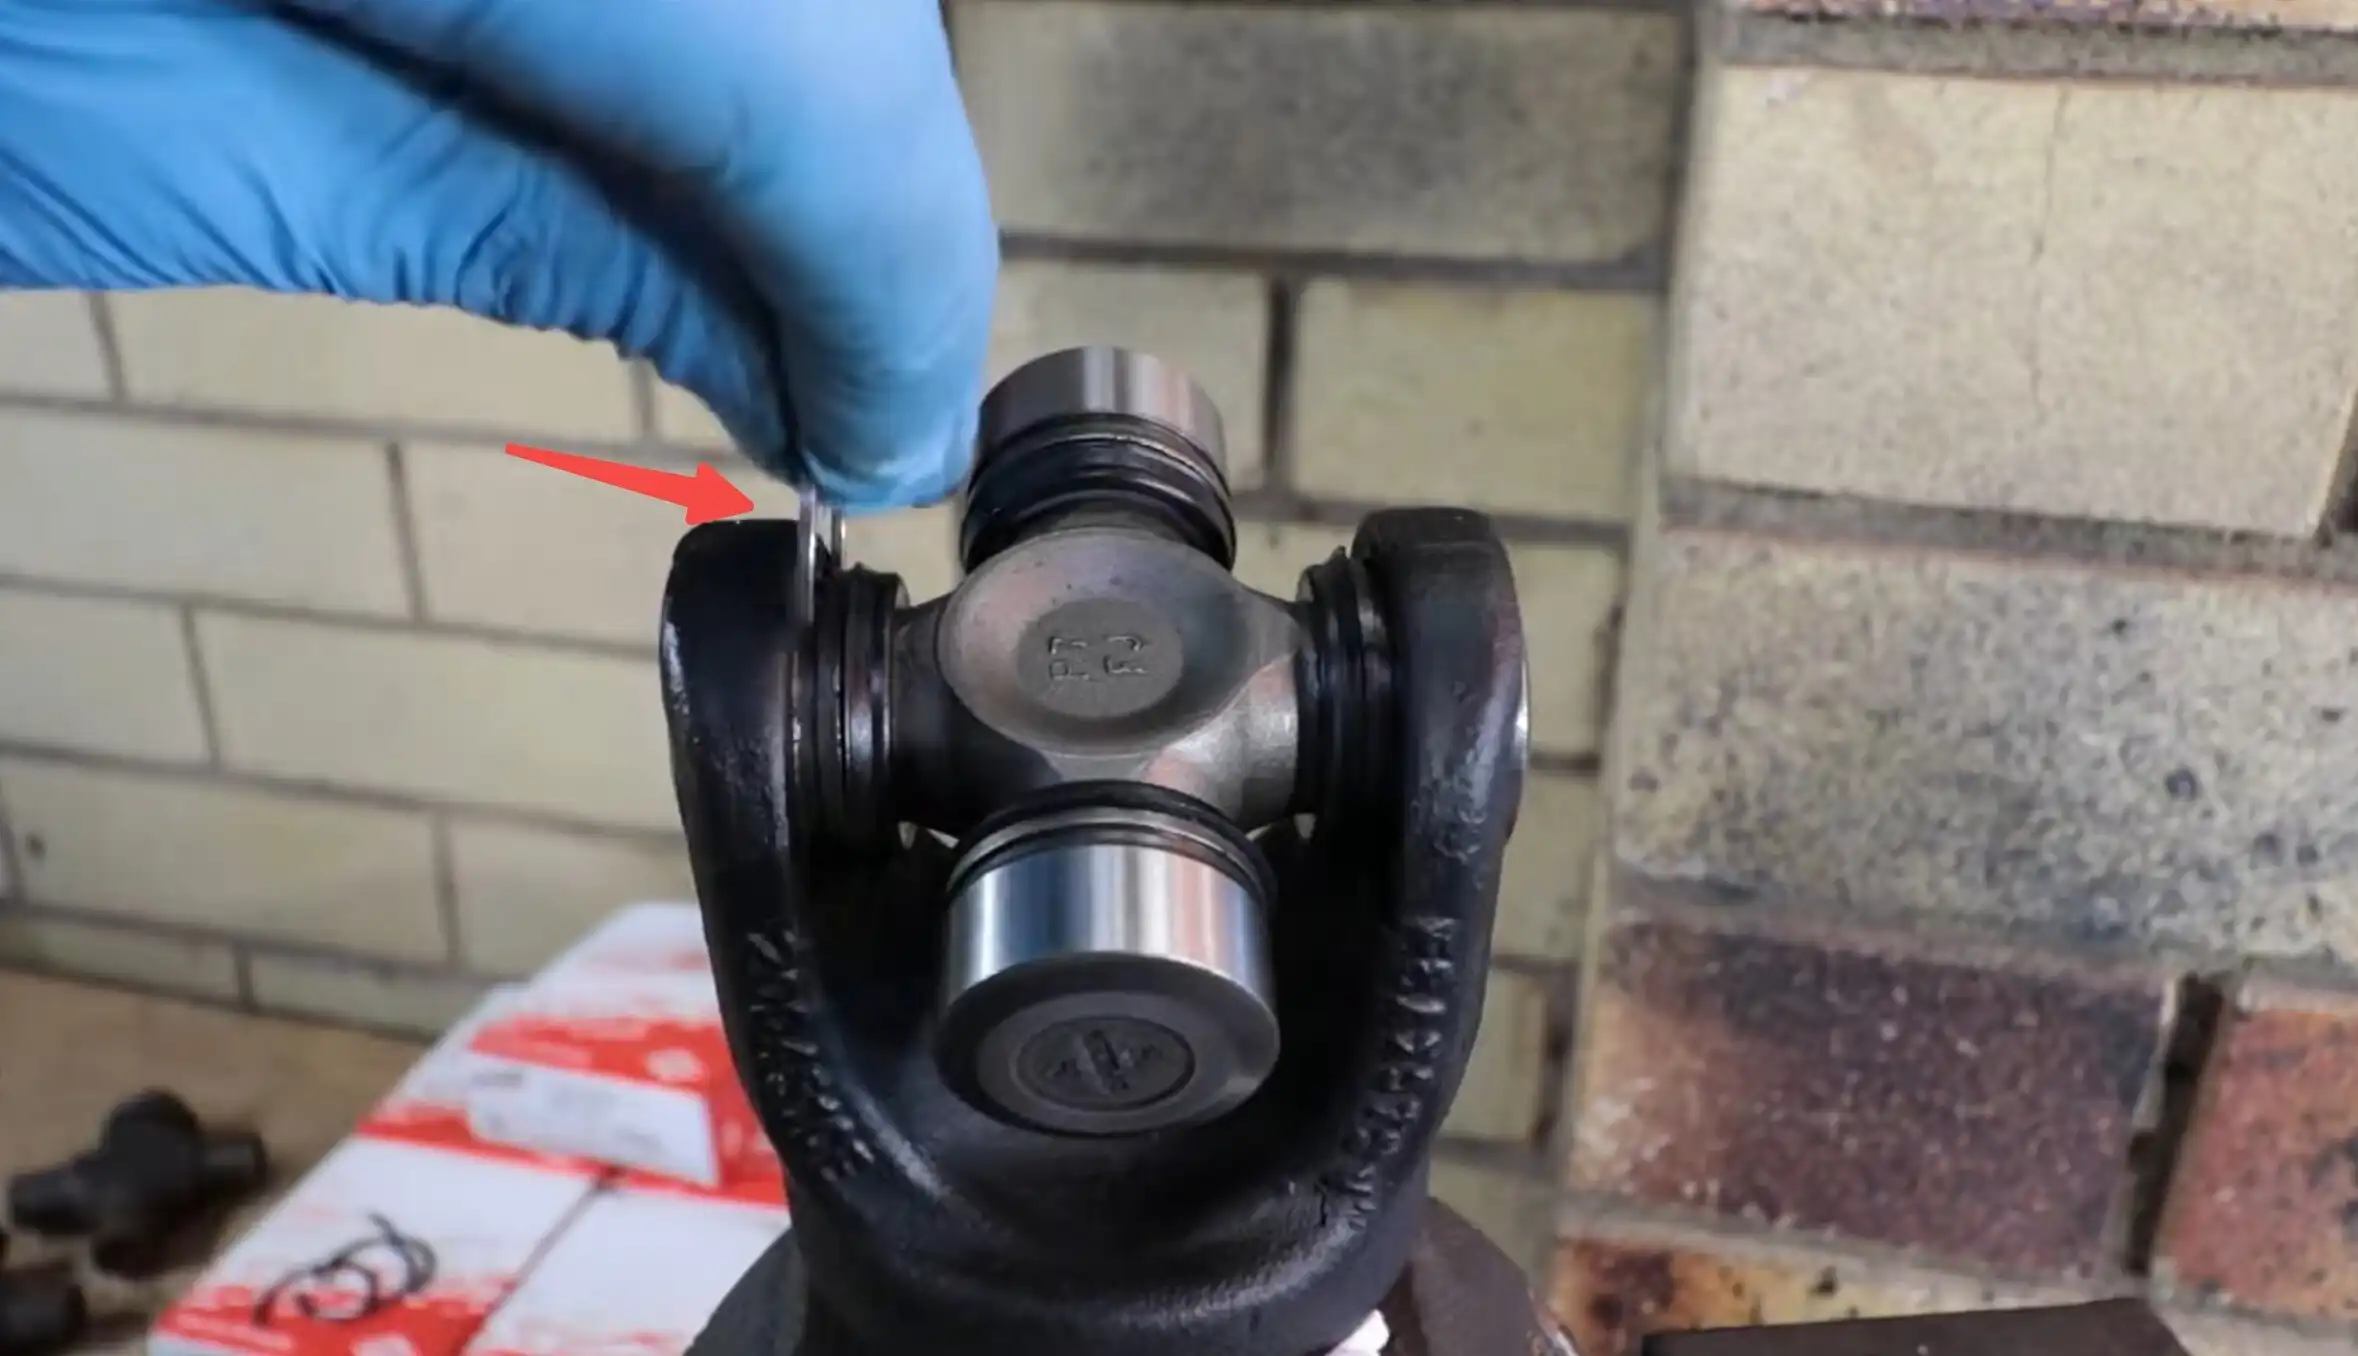
3. Seat a new retaining clip once the cap is in place.
4. Flip the driveshaft to press in and clip the opposite cap, then repeat the whole process on the other axis, checking that the joint pivots freely by hand with no binding.
Reinstallation
With the new U-joint installed, reinstall the driveshaft and finish up.
- Reinstall the driveshaft, align your reference marks, and torque the straps or bolts to the manufacturer’s specifications.
- Grease the joint through the Zerk fitting if applicable, then take a short, low-speed test drive to check for noises or vibrations.
While doable with basic tools and patience, this job involves real force and precise fitting, so it's not ideal for first-time DIYers. A poorly seated cap or misaligned joint can cause vibration or damage later on. If you're unsure at any step, it's worth having a professional shop handle it instead.
How to Select the Best U-Joint for Your Vehicle
Buying the wrong size is the top cause of project delays. Consider these four factors to get it right the first time.
- Series Size
- Retaining Clip Style
- Greaseable vs. Maintenance-Free
- Brand Quality
Frequently Asked Questions (FAQs)
How many hours to replace U-joints?
A professional shop usually takes 1.5 to 3 hours. The time depends on your vehicle type and how many joints you need to replace. If you do it yourself at home with basic tools, expect 2 to 5 hours. Keep in mind that rust and the location of the joint can add significant time.
Can I replace just one U-joint, or should I do all of them?
You can replace just one, but it's not recommended. If one joint is worn, the others are likely close behind. Since you've already removed the driveshaft, spending a little extra time and money to replace the second joint is worth it for long‑term reliability.
Why is there a vibration after I installed the new joint?
Vibration usually means something went wrong. Binding or lock‑up often comes from dropped needle bearings or misaligned bearing cups. Excessive play usually means snap rings are not seated properly or the U‑joint size is wrong. In both cases, the joint needs to be reinstalled correctly. If you suspect a size mismatch, visit the Zeke Parts website to find the exact replacement.
Conclusion
U-joint replacement is a manageable DIY job that can help reduce labor costs. Catch the warning signs early, use the right tools, and work carefully to avoid damaging the yoke. With proper preparation, many drivers can complete this repair and restore smooth driveshaft operation.
The replacement joint you choose also plays an important role in long-term performance. Selecting a properly matched, quality U-joint from a reliable supplier like Zeke Parts helps ensure proper fitment and dependable operation for different driveline applications.